I made a Greek pasta salad this evening with egg noodles. It's been that kind of day. But my hands smell like garlic and butter, so all is right with the world. Before you ask, yes, Sara Lee was kicked to the curb this weekend by my baking two gorgeous bread loaves. The only reason why that recipe has not been shared yet is because it was only as I was pulling my loaves from the oven that I realized that I hadn't photographed a single step. And when yeast is involved, step-by-step photographs are very, very, very helpful.
But, onward and upward. We go through a lot of bananas in our home, or "bannies," as my toddler refers to them. But we were all a little slow to tackle the last bunch that made it home from the grocery store. Rather than toss these overripe beauties, I made banana bread. It's a winner everytime.
Here are the necessary players: butter, sugar, a lonely egg, vanilla, oat bran cereal, flour, baking powder, baking soda, salt, really, really, really ripe bananas, and walnuts.
With a recipe that prominently features fruit, it's almost like the ingredients are smiling back at you.
Because we have diabetic needs in mind, you could substitute the butter for lite margarine, and also use a sugar substitute. I use Splenda for this recipe, but there are several readily available options at your grocery store.
Oat bran cereal may be the hardest ingredient to find. It's always on the top shelf of the cereal aisle. Be sure to read the "fine print" and make sure you pick up oat bran. This gives the bread a great texture, in addition to adding a significant amount of fiber.
Mix together the flour, baking powder, baking soda, and salt.
Cream together the butter and sugar.
Add the one lonely egg and vanilla extract and mix well.
Realize that you still had your dough hook on your mixer from baking two very gorgeous, fluffy loaves of bread earlier in the day and switch it out for a more appropriate attachment. Ah, that's better.
Add the oat bran cereal and mix until combined.
Mash those really, really, really ripe bananas. There are many ways to mash bananas, but I took a short cut, threw them into the measuring cup and took a fork to them. That way I can measure as a mash. Or is it whistle while I work?
This can really be very therapeutic after a long day.
Add part of the flour mixture to the batter.
Add part of the mashed bananas to the batter. Continue alternating--flour--bananas--flour--bananas. Mix well after each addition. And smell this batter, too! Adding the bananas introduces a wonderful aroma.
Admire your well-mixed batter, or scrape down the side of the bowl, as needed, to ensure the batter is mixed well.
The last addition is some chopped walnuts. What is banana nut bread without the nuts, after all?
Pour the batter into a greased loaf pan and bake in a 350-degree oven.
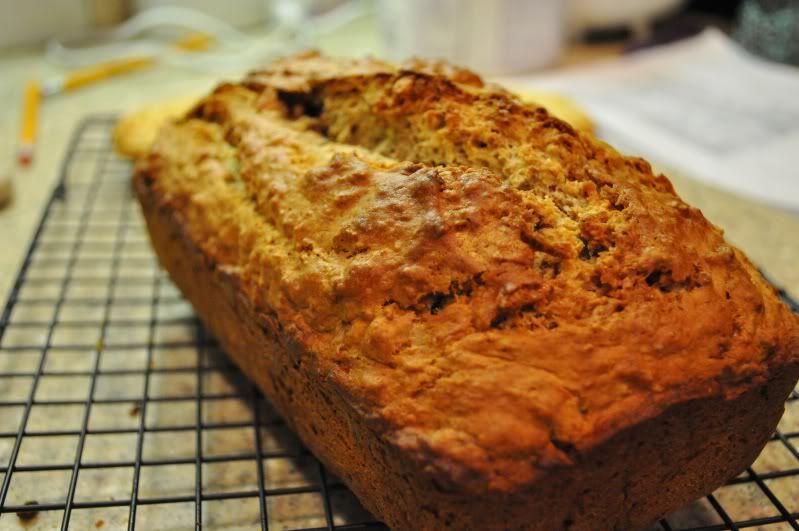
After 1 hour, you'll have a gorgeous loaf of banana nut bread. Remove it from the pan and allow it to cool on a cooling rack. This is great out of the oven, toasted, or even cold.
While I'm a huge fan of banana nut bread regardless of the recipe behind it, I really do enjoy making this from time to time because it is diabetic friendly, if appropriate substitutions are made. A diabetic diet is one of the healthiest ways to eat, and does not have to mean the elimination of all carbohydrates--savory or sweet--from the menu. In fact, I'm such a huge proponent of diabetic food principles that I have several diabetic cookbooks in my cupboard, a few of which I frequent often.
No matter your health preferences, you can't go wrong with this recipe.
Diabetic Friendly Banana Nut Bread
From the Type II Diabetes Cookbook
Prep: 20 minutes | Bake: 60 minutes | Servings: Depends on how you slice it
Ingredients
1/4 c. butter or lite margarine
1/2 c. sugar (up to 1/4 c. sugar substitute may be used)
1 egg
1 tsp. vanilla extract
1 c. oat bran cereal
1 1/2 c. flour
2 tsp. baking powder
1/2 tsp. baking soda
1/2 tsp. salt
1 1/2 c. mashed bananas
1/2 c. chopped walnuts
Instructions
Preheat your oven to 350-degrees.
Pour the batter into a greased loaf pan. Bake 60 minutes or until a toothpick inserted into the center comes out clean. Remove the bread from the pan and allow it to cook on a cooling rack.
Enjoy!


No comments:
Post a Comment